The chrome.gcm API to enable the extensions to send and receive messages via Firebase’s Cloud Messaging (FCM). Official Documentation here: https://developer.chrome.com/docs/extensions/reference/api/gcm
What is GCM or FCM?
https://cdn.embedly.com/widgets/media.html?src=https%3A%2F%2Fwww.youtube.com%2Fembed%2FsioEY4tWmLI%3Ffeature%3Doembed&display_name=YouTube&url=https%3A%2F%2Fwww.youtube.com%2Fwatch%3Fv%3DsioEY4tWmLI&image=https%3A%2F%2Fi.ytimg.com%2Fvi%2FsioEY4tWmLI%2Fhqdefault.jpg&key=a19fcc184b9711e1b4764040d3dc5c07&type=text%2Fhtml&schema=youtube
Well the first, Google Cloud Messaging and Firebase Cloud Messaging are the same thing, so let’s get that out the way. FCM is an improvement of GCM. According the Firebase Team, FCM is a reliable no-cost way for sending message to the client’s app. For instance, the notification that YouTube sends subscribers to a channel that a new video is available.
This works well with the chrome.notifications API. You can read about the chrome.notifications API in our previous article Understanding Chrome Extensions Notifications.
How to declare it in Manifest.json
{
...
    "permissions": [
        "gcm"
    ],
 ...
}
How to setup your project to send a message
You’ll need a firebase account and project to send FCM messages. We will show you how it is done but if you need a quick guide on setting everything on the firebase side of things you can look at their guide here: https://developer.chrome.com/docs/extensions/how-to/integrate/chrome.gcm
First you need to send up a Firebase account and project to send a message to your extensions. If you are not familiar with Firebase you can watch this quick guide from the Firebase Team to familiarize yourself with the platform.
https://cdn.embedly.com/widgets/media.html?src=https%3A%2F%2Fwww.youtube.com%2Fembed%2FO17OWyx08Cg%3Ffeature%3Doembed&display_name=YouTube&url=https%3A%2F%2Fwww.youtube.com%2Fwatch%3Fv%3DO17OWyx08Cg&image=https%3A%2F%2Fi.ytimg.com%2Fvi%2FO17OWyx08Cg%2Fhqdefault.jpg&key=a19fcc184b9711e1b4764040d3dc5c07&type=text%2Fhtml&schema=youtube
Setting Up Firebase Account
If you already have a project setup you can skip this step.
- Go to Firebase.com : https://console.firebase.google.com/?pli=1
- You should be greeted with page and button that allows to create your first project.
- Enter your project name and accept term and conditions.

4. If there are any more Continue buttons to press. Click ‘em.
Get Your Firebase Sender ID
Once you’ve succesfully created your Firebase Project go to the Cloud Messaging Section to copy your Sender ID. The Sender ID is need to enable your extension to received notifications from this Firebase Project.

Enable Cloud Message API for your Firebase Project
Its a pain, but you also need to accept the Terms of Services from the Google Cloud Dashboard it is it first time creating a Firebase project.


Register Your Extension to Receive Firebase Cloud Messages
You’ll write this code in your background script. To register for Firebase Cloud Messaging from the at Sender ID
// You'd want to register for FCM once.
// So we will register when the chrome extension is installed
chrome.runtime.onInstalled.addListener((details) => {

    // Yes you can add more than one senderId
    const senderIds = ['1247****2552'];

    chrome.gcm.register(senderIds, (registrationId) => {

        // registrationId - The chrome extension's FCM id.
        console.log(registrationId);
    });
});
Send Message via Firebase
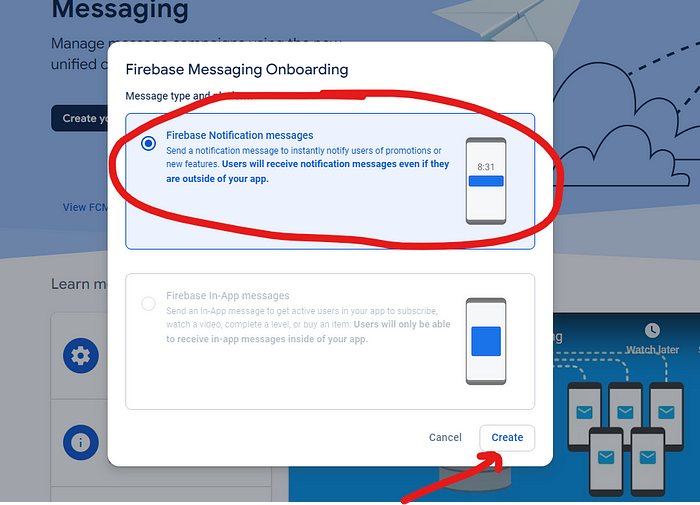
You have to add a web app. Just click a web app button and name the webapp, preferably the same name as your extension.

Do not worry about Add Firebase SDK, install Firebase CLI or Depoy to Firebase Hosting. Those are configuration for a webapp, we are just interested in the messaging part. Click Next on all of those and Continue to console.
You should see a screen that look like this


Fill in the title and body and click the send test message button. Select default options for the other sections below the 1 Notifications section.

You will see a popup asking you to put a FCM registration token

We are going to use the registrationId we got from our background script code.
// You'd want to register for FCM once.
// So we will register when the chrome extension is installed
chrome.runtime.onInstalled.addListener((details) => {

    // Yes you can add more than one senderId
    const senderIds = ['1247****2552'];

    chrome.gcm.register(senderIds, (registrationId) => {

        // registrationId - The chrome extension's FCM id.
        console.log(registrationId);
    });
});
Sample Project
Manifest.json
We’ve include notifications to help us show the message coming from Firebase
{
    "name": "Firebase Cloud Message",
    "version": "1.0.0.0",
    "manifest_version": 3,
    "permissions": [
        "gcm",
        "notifications"
    ],
    "background": {
        "service_worker": "background.js"
    }
}


