Solid JS is a declarative JavaScript library for building user interfaces. Like React and Vue, Solid JS is designed to help developers create reactive web applications, but it distinguishes itself with a unique approach to reactivity and performance. Created by Ryan Carniato, Solid JS focuses on fine-grained reactivity and a compilation-based approach to minimize overhead and maximize speed.
1 Create a Solid JS Project
Open your terminal in the folder you want to create a new Solid JS project and enter the following command. You can look at the official documentation from the Solid JS team for more info.
npx degit solidjs/templates/js solid-extension
Navigate into your project folder and install dependencies
cd solid-extension
npm i
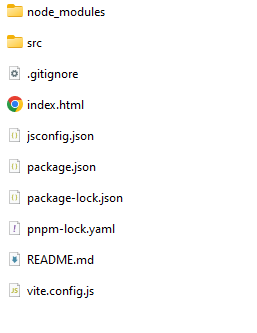
Your file structure should look something like this.
2 Create manifest.json
The manifest.json we are about to create specifies basic metadata about your extension to the browser such as the name and version, and can also specify aspects of your extension’s functionality.
Create a manifest.json file and add the following json data inside. It should look something like this.
{
    "name": "Hello World",
    "short_name": "Hello World",
    "version": "1.0.0.0",
    "description": "Hello World my very first extension",
    "manifest_version": 3,
    "action": {
        "default_popup": "index.html",
        "default_title": "Hello World Popup"
    }
}
There are many things you can do with the manifest.json file. You can look at the documentation the Google provides about it here. It is beyond the scope of this article. It is important to mention that be careful using ChatGPT to generate the manifest.json file for because as you can see we are using manifest_version: 3, while ChatGPT and other AI tool may give you results on manifest_version: 2. And yes there are different, especially in the way the manifest.json file is structured. The manifest_version: 2 has been discontinued by Google for chrome extensions.
Run this command to build your Solid JS project.
npm run build
The reason we are building the project is because the chrome browser needs access to the web files to run the extension.
3 — Installing your chrome extension
3.1 — Setting up chrome
First you need to go to the extension dashboard or you can type chrome://extensions in the url bar.

An alternative is navigating there with the option menu.
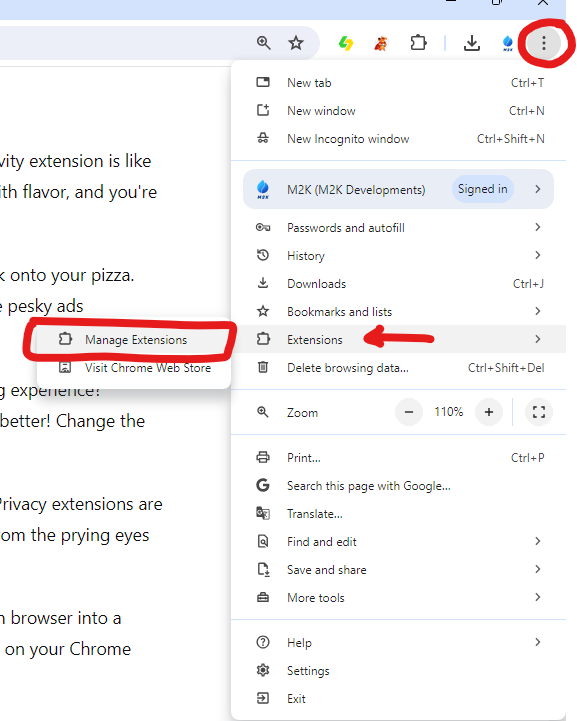
To your top-right you will see a toggle button for Developer Mode make sure that is on.

3.2 — Adding your extension to chrome
To you top-left you will see a button that say Load unpacked.
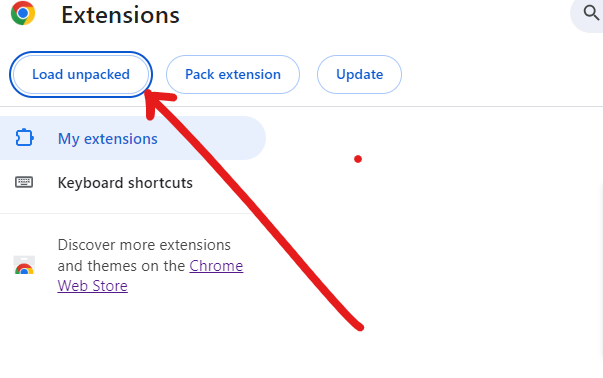
When you click that button choose the dist folder (contains the extension code).
3.3 — Pinning the Extension
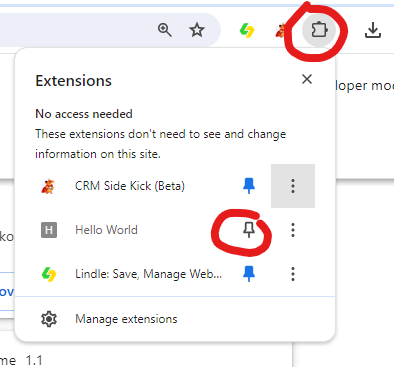
To pin the extension on the app bar, click the puzzle icon and then the pin icon extension to the your extension name.
