Vue.js, often referred to simply as Vue, is a progressive JavaScript framework used for building user interfaces and single-page applications. It was created by Evan You and first released in February 2014. Vue is designed to be incrementally adoptable, which means you can use as much or as little of the framework as you need for your project.
Install Vue CLI
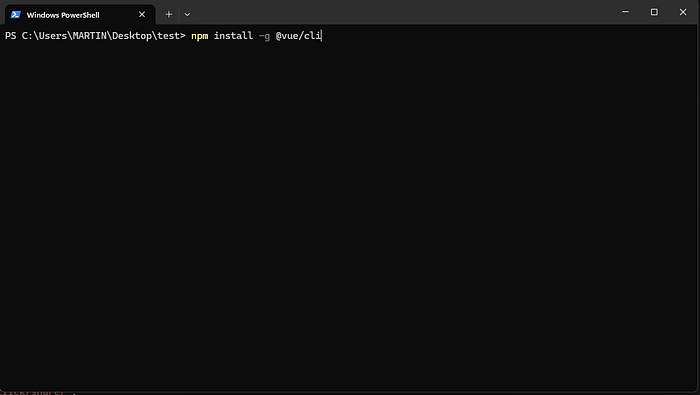
Open your terminal and enter the following command. In case Vue has done some changes you can always ready their official documentation.
npm install -g @vue/cli
1 Create a Vue Project
Open your terminal in the folder you want to create a new Vue project and enter the following command.
vue create vue-extension
You’ll be greeted with a smorgasbord of preset configurations. Feel free to pick from the default options or dive into manual mode to sprinkle in your own custom flair. Once you’ve made your selection, Vue CLI will roll up its sleeves, install the necessary dependencies, and whip up the basic structure of your project in no time!
Navigate into your project folder
cd vue-extension
Your file structure should look something like this

2 Create manifest.json
The manifest.json we are about to create specifies basic metadata about your extension to the browser such as the name and version, and can also specify aspects of your extension’s functionality.
Go inside your public folder and create a manifest.json file and add the following json data inside. It should look something like this.
{
    "name": "Hello World",
    "short_name": "Hello World",
    "version": "1.0.0.0",
    "description": "Hello World my very first extension",
    "manifest_version": 3,
    "action": {
        "default_popup": "index.html",
        "default_title": "Hello World Popup"
    }
}
There are many things you can do with the manifest.json file. You can look at the documentation the Google provides about it here. It is beyond the scope of this article. It is important to mention that be careful using ChatGPT to generate the manifest.json file for because as you can see we are using manifest_version: 3, while ChatGPT and other AI tool may give you results on manifest_version: 2. And yes there are different, especially in the way the manifest.json file is structured. The manifest_version: 2 has been discontinued by Google for chrome extensions.
Run this command to build your Vue project.
npm run build
The reason we are building the project is because the chrome browser needs access to the web files to run the extension. You can NOT use your public folder for that since it does not have the JavaScript bundled and connected to your index.html. However, In your dist folder, your React project bundles everything together into web files that can be used locally with creating a server. You can observer the difference when you go in your public folder and then into the dist folder.
3 — Installing your chrome extension
3.1 — Setting up chrome
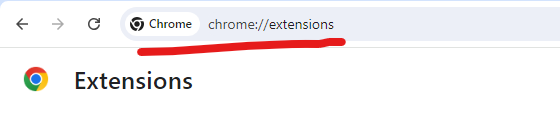
First you need to go to the extension dashboard or you can type chrome://extensions in the url bar.
An alternative is navigating there with the option menu.
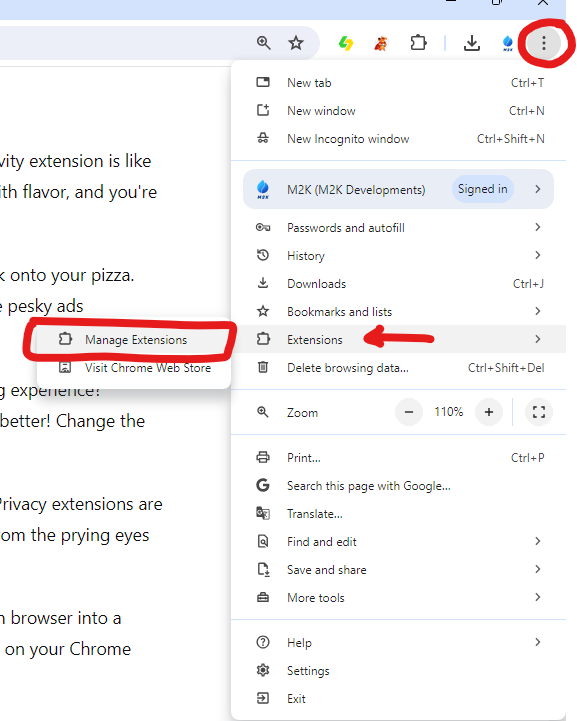
To your top-right you will see a toggle button for Developer Mode make sure that is on.

3.2 — Adding your extension to chrome
To you top-left you will see a button that say Load unpacked.
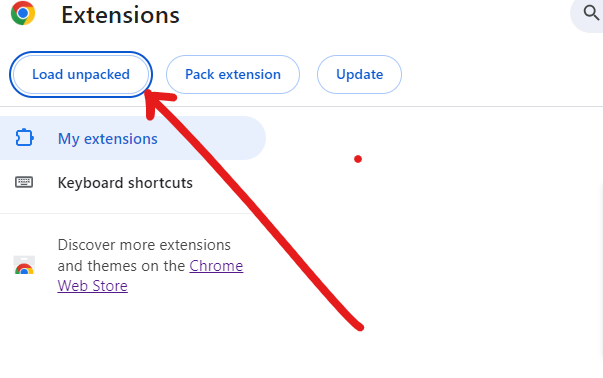
When you click that button choose the dist folder (contains the extension code).
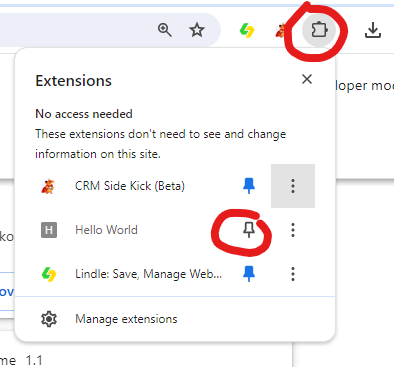
3.3 — Pinning the Extension
To pin the extension on the app bar, click the puzzle icon and then the pin icon extension to the your extension name.